


how to wear a tie

-
Table of Contents
- Classic Windsor Knot: Step-by-Step Guide
- Mastering the Half-Windsor Knot
- The Perfect Four-in-Hand Knot
- How to Tie a Pratt Knot
- Bow Tie Basics: Tying and Styling
- Choosing the Right Tie for Your Suit
- Matching Ties with Shirt Patterns
- The Art of the Eldredge Knot
- How to Tie a Trinity Knot
- Accessorizing Your Tie: Clips, Bars, and Pins
- Q&A
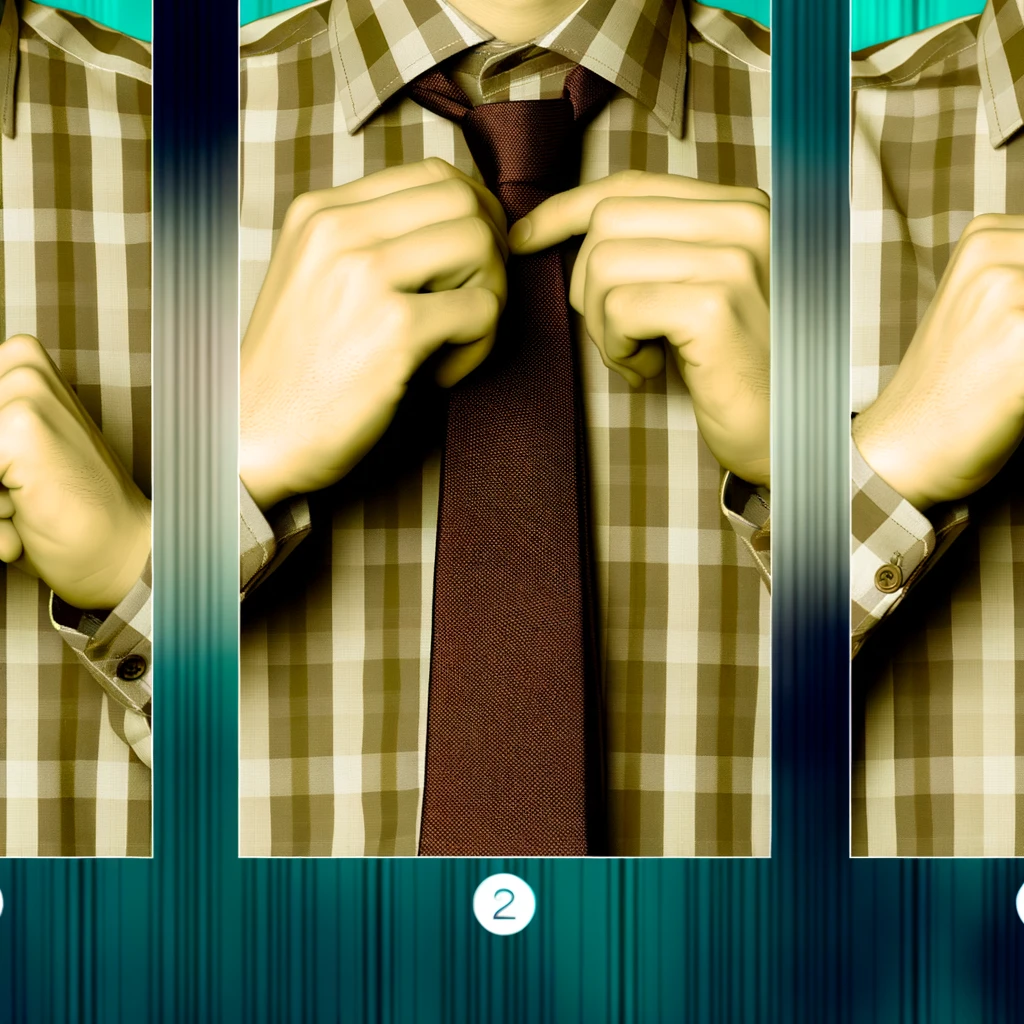
Wearing a tie is a timeless skill that adds a touch of sophistication and professionalism to any outfit. Whether you’re preparing for a formal event, a business meeting, or simply want to elevate your everyday attire, knowing how to properly tie a tie is essential. This guide will walk you through the steps of selecting the right tie, choosing the appropriate knot, and mastering the technique to ensure your tie looks sharp and polished. With a little practice, you’ll be able to confidently wear a tie and make a lasting impression.
Classic Windsor Knot: Step-by-Step Guide
The art of wearing a tie is a timeless skill that exudes elegance and sophistication. Among the various knots, the Classic Windsor Knot stands out for its symmetrical and polished appearance, making it a favorite for formal occasions and professional settings. Mastering this knot not only enhances your wardrobe but also boosts your confidence, allowing you to make a lasting impression. Let’s embark on this journey together, step by step, to perfect the Classic Windsor Knot.
First, start with the right tie. Choose a tie that complements your outfit and is made of a material that is easy to manipulate, such as silk or a silk blend. Stand in front of a mirror and drape the tie around your neck, with the wide end on your right side and the narrow end on your left. The wide end should hang about 12 inches lower than the narrow end. This initial positioning is crucial, as it sets the foundation for the entire knot.
Next, cross the wide end over the narrow end, forming an X just below your chin. Hold the intersection point with one hand to keep it secure. With your other hand, bring the wide end up through the loop between your collar and the tie. Pull it down to tighten the knot slightly. This step creates the first loop of the Windsor Knot, giving it its characteristic fullness.
Now, take the wide end and pass it behind the narrow end, moving from right to left. This maneuver adds structure to the knot, ensuring it remains firm and symmetrical. Once again, bring the wide end up through the loop between your collar and the tie, but this time, pull it down through the front loop you just created. This forms the second loop, adding to the knot’s balanced appearance.
At this point, you should have a triangular shape forming at the base of your neck. Adjust the tightness by gently pulling on the wide end while holding the narrow end steady. The knot should be snug but not overly tight, allowing for comfort and ease of movement. The beauty of the Windsor Knot lies in its symmetry, so take a moment to ensure both sides are even.
With the knot taking shape, it’s time to add the finishing touches. Bring the wide end down over the front of the knot, covering the loops you created earlier. Pass it up through the loop between your collar and the tie one last time, then pull it down through the front loop. This final step secures the knot in place, giving it a clean and polished look.
Gently adjust the knot by holding it with one hand and pulling on the narrow end with the other. Slide the knot up towards your collar to ensure it sits neatly at the base of your neck. Smooth out any wrinkles or creases in the tie, and make sure the wide end hangs evenly over the narrow end. The Classic Windsor Knot should now be perfectly formed, exuding an air of sophistication and confidence.
In conclusion, mastering the Classic Windsor Knot is more than just a sartorial skill; it’s a rite of passage that elevates your style and presence. With practice and attention to detail, you can achieve a knot that not only looks impeccable but also makes you feel empowered. So, the next time you don a tie, embrace the elegance of the Windsor Knot and step into the world with poise and assurance.
Mastering the Half-Windsor Knot
Mastering the Half-Windsor Knot
In the world of fashion, few accessories hold the transformative power of a well-tied tie. The Half-Windsor knot, a classic choice, strikes the perfect balance between sophistication and simplicity. It is a versatile knot that can elevate your look, whether you’re heading to a business meeting or a formal event. The journey to mastering the Half-Windsor knot is not just about learning a technique; it’s about embracing a ritual that can boost your confidence and make a statement.
Imagine standing in front of the mirror, the tie draped around your neck like a blank canvas. The first step is to ensure that the wide end of the tie hangs about 12 inches lower than the narrow end. This initial positioning is crucial, as it sets the stage for the elegant knot that will soon take shape. With a deep breath, you cross the wide end over the narrow end, creating an X. This simple motion is the beginning of your transformation.
As you continue, bring the wide end up through the loop between your collar and the tie. This upward motion is symbolic, lifting your spirits and setting the tone for the day ahead. Next, pull the wide end down, letting it rest to the left of the narrow end. This moment of pause is a reminder that even in the midst of progress, there is beauty in stillness.
Now, guide the wide end behind the narrow end, moving it from left to right. This subtle shift represents the adaptability and fluidity required in life. As you bring the wide end up again, through the loop, you are reminded of the cyclical nature of growth and learning. Each step builds upon the last, creating a foundation of elegance and poise.
With the wide end now in front, form a loop by bringing it down through the knot in front. This final motion is the culmination of your efforts, a testament to your patience and precision. As you tighten the knot by holding the narrow end and sliding the knot up to your collar, you feel a sense of accomplishment. The Half-Windsor knot, with its symmetrical and polished appearance, is a reflection of your dedication to mastering the art of tying a tie.
Wearing a tie is more than just a sartorial choice; it is an expression of your identity and aspirations. The Half-Windsor knot, with its rich history and timeless appeal, serves as a bridge between tradition and modernity. It is a reminder that even in a fast-paced world, there is value in taking the time to perfect the details.
As you step away from the mirror, the tie now a seamless part of your ensemble, you carry with you a sense of pride and readiness. The Half-Windsor knot is not just a knot; it is a symbol of your commitment to excellence and your willingness to embrace the rituals that shape your journey. In mastering the Half-Windsor knot, you have not only learned a skill but also discovered a deeper connection to the art of dressing well.
The Perfect Four-in-Hand Knot
The art of wearing a tie is a timeless skill that speaks volumes about one’s attention to detail and personal style. Among the myriad of knots available, the Four-in-Hand Knot stands out for its simplicity, elegance, and versatility. Mastering this knot can transform an ordinary outfit into a statement of sophistication and confidence. Imagine standing in front of the mirror, the tie draped around your neck, ready to embark on a journey of refinement.
Begin by placing the tie around your neck, with the wide end on your right and the narrow end on your left. The wide end should hang about 12 inches lower than the narrow end. This initial positioning is crucial, as it sets the stage for the perfect knot. As you cross the wide end over the narrow end, envision the knot taking shape, a symbol of your meticulous nature and commitment to excellence.
Next, bring the wide end under the narrow end, creating a loop around the narrow end. This motion, though simple, is the foundation of the Four-in-Hand Knot. It is in these small, deliberate steps that the beauty of the knot begins to emerge. As you continue, bring the wide end back over the narrow end, forming a horizontal band. This band is not just a part of the knot; it is a testament to your ability to blend tradition with modernity.
Now, pull the wide end up through the loop around your neck. This upward motion is symbolic, representing your aspirations and the heights you aim to reach. As the wide end emerges from the loop, you are reminded that every detail matters, and every step is a part of the journey. Thread the wide end down through the horizontal band you created earlier. This final step is where the knot comes to life, a culmination of your efforts and attention to detail.
As you tighten the knot by holding the narrow end and sliding the knot up to your collar, take a moment to appreciate the craftsmanship. The Four-in-Hand Knot, with its slightly asymmetrical shape, exudes a charm that is both classic and contemporary. It is a reflection of your personality, a blend of tradition and individuality.
Wearing a tie is more than just a sartorial choice; it is an expression of who you are. The Four-in-Hand Knot, with its rich history and timeless appeal, is a reminder that elegance lies in simplicity. As you step out, the knot resting perfectly against your collar, you carry with you a piece of history, a nod to the countless individuals who have worn this knot with pride.
In a world that often rushes towards complexity, the Four-in-Hand Knot stands as a beacon of simplicity and grace. It is a reminder that sometimes, the most profound statements are made with the simplest gestures. So, the next time you find yourself reaching for a tie, remember the journey of the Four-in-Hand Knot. Embrace the process, savor each step, and wear your tie with the confidence that comes from knowing you have mastered an art that transcends time.
How to Tie a Pratt Knot
The art of wearing a tie is a timeless skill that can elevate any outfit, transforming a simple shirt into a statement of elegance and sophistication. Among the myriad of knots available, the Pratt Knot stands out for its balance of simplicity and style. Learning how to tie a Pratt Knot is not just about mastering a technique; it’s about embracing a tradition that has been passed down through generations, adding a touch of class to your everyday attire.
To begin, drape the tie around your neck with the seam facing outward. The wide end should hang on your right side, while the narrow end rests on your left. Adjust the length so that the wide end is about 12 inches lower than the narrow end. This initial setup is crucial, as it sets the stage for the elegant symmetry that the Pratt Knot is known for.
Next, cross the wide end under the narrow end, creating an X shape just below your chin. This underhanded start is what differentiates the Pratt Knot from other knots, giving it a unique structure that is both sturdy and stylish. As you make this cross, envision the final product: a knot that is neither too bulky nor too slim, but perfectly balanced.
Now, take the wide end and bring it up through the loop around your neck. This motion should be smooth and deliberate, as if you are guiding the fabric with a sense of purpose. Once the wide end is through the loop, pull it down and let it rest. At this point, you should see the beginnings of a knot forming, a small but significant milestone in your journey to mastering the Pratt Knot.
With the wide end now hanging in front, cross it over the narrow end from right to left. This step is akin to laying the foundation of a building; it requires precision and care. As you make this cross, ensure that the fabric lies flat and smooth, free of any wrinkles or twists. The elegance of the Pratt Knot lies in its clean lines and symmetrical form, so attention to detail is paramount.
Following this, bring the wide end up through the loop around your neck once more. This second ascent is like a climactic moment in a story, where all the elements come together in perfect harmony. As you pull the wide end through, you’ll notice the knot taking shape, a testament to your patience and skill.
Finally, tuck the wide end down through the front loop you’ve just created. This last step is the finishing touch, the grand finale that brings the entire knot together. Gently pull the wide end down, adjusting the knot as needed to ensure it sits snugly against your collar. The result is a Pratt Knot that exudes confidence and sophistication, a reflection of your dedication to mastering this timeless art.
In conclusion, tying a Pratt Knot is more than just a practical skill; it’s an expression of style and elegance. Each step, from the initial cross to the final tuck, is an opportunity to engage with a tradition that has stood the test of time. As you perfect your technique, remember that the true beauty of the Pratt Knot lies not just in its appearance, but in the care and attention you invest in creating it. So, stand tall, adjust your tie, and step into the world with a newfound sense of confidence and grace.
Bow Tie Basics: Tying and Styling
The bow tie, a timeless accessory, has the power to transform an ordinary outfit into an extraordinary ensemble. It exudes an air of sophistication and charm, making it a staple for those who wish to stand out with elegance. However, the art of tying and styling a bow tie can seem daunting to many. Fear not, for with a bit of practice and a touch of creativity, anyone can master this classic piece.
To begin with, understanding the anatomy of a bow tie is essential. It consists of two loops and two tails, which, when tied correctly, form a symmetrical bow. The first step in tying a bow tie is to drape it around your neck, ensuring that one end is slightly longer than the other. This asymmetry is crucial, as it allows for the necessary adjustments later on. Cross the longer end over the shorter end, creating an ‘X’ shape, and then tuck it under and through the loop, forming a simple knot.
Next, fold the shorter end horizontally to create the front loop of the bow. This is where precision and patience come into play. Hold this loop in place while you bring the longer end down over the center of the bow. This step is pivotal, as it sets the foundation for the final shape. Now, fold the longer end back on itself to form the back loop, and tuck it behind the front loop. Adjust the loops and tails to ensure they are even and symmetrical.
As you tighten the knot, remember that a bow tie should not be overly tight or too loose. It should sit comfortably around your neck, allowing for ease of movement while maintaining its shape. The beauty of a bow tie lies in its imperfections; a slightly askew bow adds character and charm, making it uniquely yours.
Styling a bow tie is where creativity truly shines. Traditionally, bow ties are paired with formal attire, such as tuxedos and suits. However, they can also be worn with more casual outfits to add a touch of flair. For a classic look, opt for a black or navy bow tie with a crisp white shirt and a tailored suit. This combination exudes timeless elegance and is perfect for formal events.
For a more contemporary approach, experiment with patterns and colors. A polka dot or paisley bow tie can add a playful element to your outfit, while a bold color can make a striking statement. When choosing a patterned bow tie, ensure that it complements the rest of your attire without overwhelming it. Balance is key; a busy pattern should be paired with a more subdued shirt and suit.
Accessorizing with a bow tie also opens up opportunities to showcase your personality. Consider adding a pocket square or a pair of cufflinks that echo the colors or patterns of your bow tie. These small details can elevate your look and demonstrate a keen eye for style.
In conclusion, mastering the bow tie is a journey of patience, practice, and creativity. It is an accessory that allows for personal expression while maintaining an air of sophistication. Whether you are attending a formal event or simply wish to add a touch of elegance to your everyday attire, the bow tie is a versatile and timeless choice. Embrace the challenge, experiment with styles, and let your bow tie be a reflection of your unique personality.
Choosing the Right Tie for Your Suit
Choosing the right tie for your suit is an art form that can elevate your entire look, transforming a simple outfit into a statement of elegance and sophistication. The journey begins with understanding the harmony between your suit and tie, a relationship that can either make or break your ensemble. Imagine stepping into a room, the subtle sheen of your tie catching the light, drawing eyes and admiration. This is the power of a well-chosen tie.
First, consider the color palette. The tie should complement, not clash with, your suit. A navy suit, for instance, pairs beautifully with a burgundy or deep red tie, creating a classic and timeless look. On the other hand, a grey suit offers versatility, allowing for a broader range of colors from soft pastels to bold, vibrant hues. The key is balance; the tie should stand out without overwhelming the suit. Think of it as a dance, where both partners move in sync, each enhancing the other’s grace.
Next, the pattern of the tie plays a crucial role. Solid ties are a safe bet, exuding simplicity and elegance. However, don’t shy away from experimenting with patterns. Stripes, polka dots, and paisleys can add a touch of personality and flair. When choosing a patterned tie, ensure it doesn’t compete with the suit’s fabric. A pinstriped suit, for example, pairs well with a solid or subtly patterned tie, while a plain suit can handle more intricate designs. The goal is to create a cohesive look where each element complements the other.
Fabric choice is another essential factor. Silk ties are the epitome of luxury, offering a smooth texture and a slight sheen that catches the eye. They are perfect for formal occasions and business settings. Wool ties, on the other hand, provide a more textured and matte finish, ideal for a sophisticated yet relaxed look. Linen ties are great for summer, adding a light and breezy touch to your outfit. The fabric should align with the season and the formality of the event, ensuring you look appropriate and stylish.
The width of the tie is also significant. A general rule of thumb is to match the tie’s width to the lapel of your suit jacket. Slim ties work well with narrow lapels, creating a modern and sleek appearance. Wider ties, conversely, complement broader lapels, offering a more traditional and robust look. This attention to detail ensures a balanced and proportionate silhouette, enhancing your overall presentation.
Finally, the knot you choose can add the finishing touch to your ensemble. The classic Windsor knot exudes confidence and authority, perfect for important meetings and formal events. The Four-in-Hand knot, with its asymmetrical shape, offers a more relaxed and approachable vibe, suitable for everyday wear. Experiment with different knots to find the one that best suits your style and the occasion.
In conclusion, choosing the right tie for your suit is about understanding the delicate interplay of color, pattern, fabric, width, and knot. It’s about expressing your personality while maintaining a sense of harmony and balance. As you stand before the mirror, adjusting your tie, remember that this small piece of fabric holds the power to transform your look, boost your confidence, and leave a lasting impression. Embrace the art of wearing a tie, and let it be a reflection of your unique style and elegance.
Matching Ties with Shirt Patterns
Matching ties with shirt patterns can be an art form, a delicate dance of colors, textures, and designs that, when done correctly, can elevate your style to new heights. Imagine stepping into a room and feeling the eyes of admiration upon you, not because of the brand you wear, but because of the harmony and confidence your ensemble exudes. This is the power of mastering the art of matching ties with shirt patterns.
To begin with, consider the foundation of your outfit: the shirt. The shirt is your canvas, and the tie is the brushstroke that adds depth and character. When choosing a tie to pair with a patterned shirt, the first rule is to ensure that the patterns do not clash. For instance, if you have a shirt with a bold, large check pattern, opt for a tie with a more subtle design. A solid-colored tie or one with a small, understated pattern can complement the shirt without overwhelming it.
Transitioning to the next point, color coordination is crucial. The colors of your tie and shirt should harmonize rather than compete. A good rule of thumb is to pick a tie that incorporates one or more of the colors found in your shirt. For example, if you are wearing a blue and white striped shirt, a tie with shades of blue or even a contrasting color like burgundy can create a cohesive look. The key is to find a balance where the colors enhance each other, creating a visual symphony that is pleasing to the eye.
Moreover, texture plays a significant role in the overall aesthetic. A silk tie paired with a crisp cotton shirt can create a sleek, polished look, perfect for formal occasions. On the other hand, a wool tie with a flannel shirt can evoke a sense of warmth and approachability, ideal for more casual settings. By experimenting with different textures, you can add another layer of sophistication to your outfit.
As we delve deeper into the intricacies of matching ties with shirt patterns, it is essential to consider the scale of the patterns. If your shirt has a small, intricate pattern, a tie with a larger, bolder design can provide a striking contrast. Conversely, if your shirt features a large pattern, a tie with a smaller, more delicate design can create a balanced look. This interplay of scales can add a dynamic element to your attire, making it visually interesting without being overwhelming.
Furthermore, do not be afraid to express your personality through your choices. Fashion is a form of self-expression, and your tie can be a statement piece that reflects your individuality. Whether you prefer classic, timeless designs or bold, contemporary patterns, let your tie be an extension of who you are. Confidence is the best accessory, and when you feel good in what you wear, it shows.
In conclusion, matching ties with shirt patterns is not just about following rules; it is about creating harmony and expressing your unique style. By considering factors such as pattern compatibility, color coordination, texture, and scale, you can craft an ensemble that is both stylish and personal. So, the next time you reach for a tie, think of it as an opportunity to paint your canvas with creativity and confidence. Embrace the art of matching, and let your style speak volumes.
The Art of the Eldredge Knot
The Eldredge Knot is not just a method of tying a tie; it is a statement, a testament to the art of personal expression through fashion. Unlike the traditional Windsor or Four-in-Hand knots, the Eldredge Knot is a complex, intricate design that commands attention and admiration. It is a knot that speaks volumes about the wearer’s attention to detail, creativity, and willingness to stand out in a crowd. To master the Eldredge Knot is to embrace a journey of elegance and sophistication, transforming a simple piece of fabric into a work of art.
To begin this journey, one must first understand the essence of the Eldredge Knot. It is a knot that requires patience and precision, but the result is a stunning, layered design that resembles a braid. The process starts with draping the tie around your neck, ensuring that the wide end hangs on your right side, extending about a foot below the narrow end on your left. This initial setup is crucial, as it sets the stage for the intricate weaving that follows.
With the narrow end in hand, cross it over the wide end, creating a small loop. This loop is the foundation upon which the Eldredge Knot is built. From here, the narrow end is brought up through the loop and pulled down, forming the first layer of the knot. Each subsequent step involves wrapping, looping, and tucking the narrow end in a precise sequence, gradually building the knot’s intricate structure. It is a dance of fabric and fingers, a choreography that requires both focus and finesse.
As you continue to weave the narrow end around the wide end, the knot begins to take shape, revealing its unique, layered design. Each wrap and tuck adds depth and dimension, transforming the tie into a sculptural masterpiece. The process may seem daunting at first, but with practice, the steps become second nature, and the knot emerges with a sense of effortless elegance.
The beauty of the Eldredge Knot lies not only in its complexity but also in its versatility. It can be worn with a variety of shirt collars and suits, adding a touch of sophistication to any ensemble. Whether you are dressing for a formal event or simply want to elevate your everyday attire, the Eldredge Knot is a perfect choice. It is a knot that exudes confidence and creativity, making a bold statement without uttering a single word.
Moreover, the Eldredge Knot is a conversation starter, a piece of wearable art that invites admiration and curiosity. It is a testament to the wearer’s dedication to style and craftsmanship, a symbol of the artistry that can be achieved with a simple tie. By mastering the Eldredge Knot, you not only enhance your wardrobe but also embrace a tradition of elegance and innovation.
In conclusion, the Eldredge Knot is more than just a way to wear a tie; it is an expression of individuality and artistry. It is a knot that challenges the conventional and celebrates the extraordinary. By taking the time to learn and perfect this intricate design, you embark on a journey of style and sophistication, transforming a simple accessory into a statement of elegance. So, embrace the art of the Eldredge Knot, and let your tie tell a story of creativity and distinction.
How to Tie a Trinity Knot
The art of wearing a tie is a timeless skill that can elevate any outfit, transforming a simple shirt into a statement of elegance and sophistication. Among the myriad of knots available, the Trinity Knot stands out as a symbol of intricate beauty and refined taste. Learning how to tie a Trinity Knot is not just about mastering a technique; it’s about embracing a tradition that speaks volumes about your attention to detail and your appreciation for the finer things in life.
To begin, select a tie that is both flexible and of medium thickness, as this will make the knotting process smoother and the final result more polished. Stand in front of a mirror, ensuring that your shirt is buttoned up to the collar and your tie is draped around your neck with the wider end on your right and the narrow end on your left. The Trinity Knot is unique in that it primarily uses the narrow end to form the knot, so allow the wide end to hang down to your desired length.
Start by crossing the narrow end over the wide end, creating an X shape just below your collar. Bring the narrow end up through the loop around your neck and then down to the left side. This initial step sets the foundation for the intricate weaving that is to follow. Next, pass the narrow end behind the wide end to the right side, then bring it up and through the loop again, this time letting it fall straight down in front.
At this point, you should have a small triangle formed by the narrow end. Now, take the narrow end and pass it horizontally behind the wide end to the left side. Bring it up and through the loop once more, but instead of letting it fall straight down, tuck it behind the small triangle you created earlier. This maneuver adds a layer of complexity and depth to the knot, making it appear more intricate and visually appealing.
Continue by taking the narrow end and passing it horizontally across the front of the knot to the right side. Bring it up through the loop around your neck and then down through the horizontal band you just created. This step tightens the knot and gives it its distinctive triangular shape. Adjust the knot by gently pulling on the narrow end and sliding the knot up towards your collar. Ensure that the layers are smooth and the knot is symmetrical, as this attention to detail is what sets the Trinity Knot apart from more common knots.
Finally, tuck the remaining narrow end behind your tie or into your shirt, ensuring that it is hidden from view. The Trinity Knot, with its threefold symmetry and intricate design, is now complete. It stands as a testament to your patience, skill, and dedication to sartorial excellence.
Wearing a Trinity Knot is more than just a fashion choice; it’s a statement of individuality and a nod to the artistry of tie-wearing. As you step out with this elegant knot adorning your collar, you carry with you a piece of tradition and a touch of modern flair. Embrace the compliments and the admiring glances, knowing that you have mastered a knot that few dare to attempt. The Trinity Knot is not just a way to wear a tie; it’s a way to wear your confidence and style with pride.
Accessorizing Your Tie: Clips, Bars, and Pins
Accessorizing your tie with clips, bars, and pins can elevate your entire look, transforming a simple outfit into a statement of sophistication and style. These small yet impactful accessories not only serve a functional purpose but also add a touch of personality and flair to your ensemble. Imagine stepping into a room, your tie perfectly complemented by a sleek tie bar or an elegant tie pin, and instantly commanding attention. The right accessory can make all the difference, turning an ordinary tie into a centerpiece of your attire.
To begin with, tie clips are a classic choice that combines utility with elegance. They are designed to keep your tie in place, preventing it from swinging and ensuring it stays neatly aligned with your shirt. When selecting a tie clip, consider the width of your tie. A general rule of thumb is that the clip should be about three-quarters the width of the tie. This proportion maintains balance and avoids overwhelming the tie. Opt for a simple, metallic finish for a timeless look, or choose a clip with subtle detailing to add a hint of character. As you slide the clip between the third and fourth buttons of your shirt, you’ll notice how it instantly sharpens your appearance, exuding confidence and attention to detail.
Transitioning to tie bars, these accessories offer a similar function but with a slightly different aesthetic. Tie bars are typically longer and flatter than tie clips, providing a broader canvas for design and embellishment. They can be an excellent way to introduce a pop of color or a unique pattern into your outfit. For instance, a tie bar with a bold stripe or a geometric design can add a modern twist to a traditional suit. When wearing a tie bar, ensure it is positioned horizontally and parallel to the ground, maintaining a clean and polished look. The tie bar should also be placed between the third and fourth buttons of your shirt, just like the tie clip. This placement not only secures your tie but also draws the eye to the center of your torso, creating a balanced and harmonious silhouette.
Finally, tie pins offer a vintage charm that can set you apart in a sea of modern accessories. Tie pins are inserted through the fabric of the tie, anchoring it to your shirt. This accessory is particularly well-suited for thicker ties or those made from textured materials, as the pin can add an extra layer of interest and depth. When choosing a tie pin, consider the overall theme of your outfit. A classic gold or silver pin can complement a formal look, while a pin with an intricate design or gemstone can add a touch of whimsy and individuality. As you carefully insert the pin through your tie, you’ll feel a sense of nostalgia and elegance, reminiscent of a bygone era where every detail mattered.
In conclusion, accessorizing your tie with clips, bars, and pins is an art that allows you to express your personal style while enhancing the functionality of your attire. Each accessory offers its unique charm and benefits, from the timeless appeal of a tie clip to the modern edge of a tie bar and the vintage allure of a tie pin. By thoughtfully selecting and positioning these accessories, you can transform your look, exuding confidence, sophistication, and a keen eye for detail. So, the next time you don a tie, remember that the right accessory can elevate your ensemble from ordinary to extraordinary, making you stand out with grace and elegance.
Q&A
1. **How do you tie a simple knot?**
– Cross the wide end over the narrow end, loop it behind, bring it over again, pull it through the neck loop, and then through the front knot.
2. **What is the proper length for a tie?**
– The tip of the tie should just touch the top of your belt buckle.
3. **How do you tie a Windsor knot?**
– Cross the wide end over the narrow end, bring it up through the neck loop, down through the loop, around the back, up through the neck loop again, and down through the front knot.
4. **What type of shirt collar works best with a skinny tie?**
– A narrow or button-down collar.
5. **How do you tie a half-Windsor knot?**
– Cross the wide end over the narrow end, bring it up through the neck loop, down through the loop, around the front, up through the neck loop again, and down through the front knot.
6. **What is a four-in-hand knot?**
– A simple and slightly asymmetrical knot where the wide end is wrapped around the narrow end and pulled through the loop.
7. **How do you tie a Pratt knot?**
– Start with the tie inside out, cross the wide end under the narrow end, bring it up through the neck loop, down through the loop, around the front, up through the neck loop again, and down through the front knot.
8. **What is the best knot for a formal occasion?**
– The Windsor knot, as it is symmetrical and wide.
9. **How do you tie a bow tie?**
– Drape the bow tie around your neck, cross one end over the other, form a bow with one end, loop the other end around the bow, and tuck it through the loop behind the bow.
10. **What is the difference between a Windsor and a half-Windsor knot?**
– The Windsor knot is fuller and more symmetrical, while the half-Windsor is smaller and easier to tie.To wear a tie, start by draping it around your neck with the wide end on your right and the narrow end on your left. Adjust the length so the wide end hangs lower. Cross the wide end over the narrow end, then bring it up through the neck loop from underneath. Pull it down, then pass it behind the narrow end horizontally. Bring it up through the neck loop again, then down through the front knot. Tighten the knot by holding it and pulling the wide end down. Adjust the tie so the knot is centered and the length is appropriate, with the tip of the wide end reaching your belt line.