


Blog
“Revive your ski jacket’s performance with expert repair techniques.”
Introduction
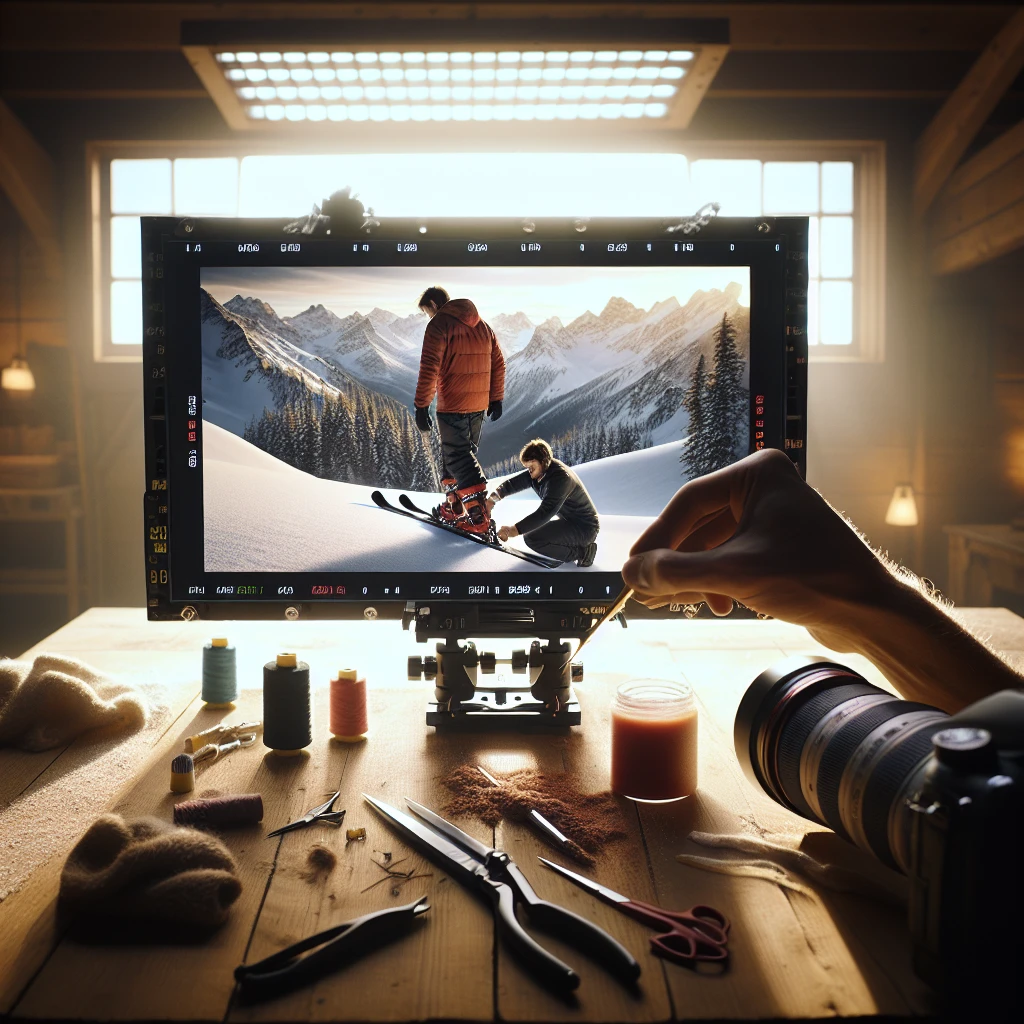
Introduction: Repairing a ski jacket is a practical and cost-effective way to extend its lifespan and ensure it continues to provide protection against the elements. Whether it’s fixing a small tear, replacing a broken zipper, or patching up a hole, repairing your ski jacket can be done with a few simple steps. In this guide, we will outline the basic techniques and materials needed to successfully repair a ski jacket, allowing you to get back on the slopes in no time.
Choosing the Right Repair Materials for Your Ski Jacket
Repairing a ski jacket can be a daunting task, but with the right materials and a little bit of creativity, you can restore your beloved jacket to its former glory. Choosing the right repair materials is crucial in ensuring a successful repair job. In this section, we will explore the various options available and guide you in making the best choice for your ski jacket.
When it comes to repairing a ski jacket, durability is key. You want to choose materials that can withstand the harsh conditions of the slopes and keep you warm and dry. One of the most popular options for repairing ski jackets is using patches. Patches come in a variety of materials, such as nylon, Gore-Tex, and even leather. These materials are not only durable but also waterproof, making them ideal for ski jackets.
Another important factor to consider when choosing repair materials is the color and design of your ski jacket. You want the repair to blend seamlessly with the rest of the jacket, so it’s important to choose materials that match the original color and pattern. Many outdoor stores offer a wide range of patches and fabrics specifically designed for repairing ski jackets, ensuring a perfect match.
In addition to patches, there are other materials you may need for repairing your ski jacket. Thread and needles are essential for sewing up any tears or loose seams. It’s important to choose a strong thread that can withstand the stress of skiing and won’t easily break. Nylon or polyester thread is a good choice for this purpose.
If your ski jacket has a broken zipper, fear not! Zippers can be easily replaced with a little bit of patience and the right tools. Look for zippers that are specifically designed for outdoor gear, as they are more durable and weather-resistant. You may also need a zipper pull, which can be easily attached to the new zipper for added convenience.
When it comes to repairing small holes or tears, adhesive patches can be a lifesaver. These patches are easy to use and require no sewing. Simply cut the patch to the desired size, peel off the backing, and stick it onto the damaged area. Adhesive patches are particularly useful for repairing small holes in the fabric or for reinforcing weak spots.
Lastly, don’t forget about the importance of proper cleaning and maintenance for your ski jacket. Regularly washing and waterproofing your jacket can help prevent future damage and prolong its lifespan. Look for specialized cleaning products that are designed for ski jackets, as they will effectively remove dirt and stains without compromising the fabric’s integrity.
In conclusion, choosing the right repair materials for your ski jacket is crucial in ensuring a successful repair job. Patches, thread, needles, zippers, adhesive patches, and cleaning products are all essential tools in your repair kit. By selecting durable materials that match the color and design of your jacket, you can restore it to its former glory and continue to enjoy the slopes in style. So don’t let a tear or a broken zipper keep you from hitting the slopes – with the right materials and a little bit of creativity, you can repair your ski jacket and get back to doing what you love.
Step-by-Step Guide to Patching Small Holes in Your Ski Jacket
Are you an avid skier who loves hitting the slopes every winter? If so, you know how important it is to have a reliable ski jacket to keep you warm and protected from the elements. However, even the best jackets can develop small holes over time due to wear and tear. Don’t worry though, because repairing those small holes is easier than you might think. In this step-by-step guide, we will show you how to patch small holes in your ski jacket, so you can continue to enjoy your favorite winter sport without any worries.
Step 1: Gather Your Materials
Before you begin the repair process, make sure you have all the necessary materials. You will need a patching kit specifically designed for outdoor gear, which typically includes adhesive patches and a heat source, such as an iron or a hairdryer. Additionally, have a pair of scissors, a clean cloth, and some rubbing alcohol on hand.
Step 2: Clean the Area
To ensure a proper bond between the patch and the jacket, it’s crucial to clean the area around the hole. Dampen a clean cloth with rubbing alcohol and gently wipe the area, removing any dirt, oils, or debris. Allow the area to dry completely before proceeding to the next step.
Step 3: Cut the Patch
Take your adhesive patch and cut it into a shape that will cover the hole with a small overlap. It’s best to cut the patch into a circular or oval shape, as these shapes tend to adhere better to curved surfaces. Make sure the patch is large enough to cover the entire hole, with at least a quarter-inch overlap on all sides.
Step 4: Apply the Patch
Peel off the backing from the adhesive patch and carefully place it over the hole, ensuring that it is centered and covers the entire damaged area. Press down firmly on the patch, applying even pressure to ensure a secure bond. If you’re using an iron, set it to a low heat setting and gently press it over the patch for a few seconds. If you’re using a hairdryer, hold it about six inches away from the patch and apply heat for approximately 30 seconds. Allow the patch to cool and bond with the jacket before moving on to the next step.
Step 5: Test the Repair
Once the patch has cooled down, it’s time to test the repair. Put on your ski jacket and move around, mimicking the motions you would make while skiing. Check if the patch stays in place and if there are any signs of peeling or lifting. If everything looks good, congratulations! You have successfully repaired your ski jacket.
Remember, this step-by-step guide is for small holes only. If your ski jacket has larger tears or extensive damage, it’s best to take it to a professional repair shop. However, for those minor holes that can be easily fixed at home, this guide should do the trick.
Repairing your ski jacket not only saves you money but also extends the life of your favorite winter gear. So, don’t let those small holes dampen your skiing spirit. With a little time and effort, you can have your jacket looking as good as new, ready to tackle the slopes with confidence. Happy skiing!
Repairing a Torn Seam on Your Ski Jacket
Are you an avid skier who loves hitting the slopes every winter? If so, you know how important it is to have a reliable ski jacket to keep you warm and protected from the elements. But what happens when your beloved jacket gets a tear in the seam? Don’t worry, repairing a torn seam on your ski jacket is easier than you might think.
First, gather all the necessary materials for the repair. You will need a needle, thread, and a thimble to protect your finger from getting pricked. Additionally, you may want to have a pair of scissors on hand to trim any loose threads. Once you have everything you need, find a comfortable and well-lit space to work in.
Begin by examining the torn seam closely. Take note of the size and location of the tear. This will help you determine the best approach for repairing it. If the tear is small, you may be able to fix it with a simple hand stitch. However, if the tear is larger or more complex, you may need to use a sewing machine or seek professional help.
Before you start sewing, make sure to clean the area around the tear. Use a damp cloth to remove any dirt or debris that may be present. This will ensure that your repair is clean and long-lasting. Once the area is clean, gently pat it dry with a towel.
Now it’s time to thread your needle. Choose a thread color that matches your ski jacket as closely as possible. This will help your repair blend in seamlessly. If you’re having trouble threading the needle, try wetting the end of the thread slightly. This will make it easier to guide through the eye of the needle.
Once your needle is threaded, it’s time to start sewing. Begin by anchoring your thread on one side of the tear. Take a small stitch through the fabric, making sure to catch both sides of the torn seam. Pull the thread tight, but not too tight, as you want to maintain the flexibility of the fabric. Repeat this process, stitching back and forth across the tear, until you reach the other side.
As you sew, be mindful of your stitches. Try to keep them as even and close together as possible. This will ensure that your repair is strong and secure. If you’re using a sewing machine, adjust the stitch length to match the original seam. This will help your repair blend in seamlessly with the rest of the jacket.
Once you’ve finished sewing, take a moment to admire your handiwork. You’ve successfully repaired the torn seam on your ski jacket! Trim any loose threads with your scissors, being careful not to cut into the fabric. Give your jacket a final once-over to make sure everything looks neat and tidy.
Repairing a torn seam on your ski jacket is a rewarding task that will extend the life of your favorite winter gear. With a little patience and some basic sewing skills, you can keep your jacket in top shape for many more ski seasons to come. So don’t let a tear in the seam hold you back from hitting the slopes – grab your needle and thread and get to work!
Replacing a Broken Zipper on Your Ski Jacket
Are you an avid skier who loves hitting the slopes every winter? If so, you know how important it is to have a reliable ski jacket to keep you warm and protected from the elements. But what happens when your trusty jacket starts to show signs of wear and tear? Don’t worry, repairing a ski jacket is easier than you might think. In this article, we will focus on one common issue: replacing a broken zipper on your ski jacket.
Picture this: you’re getting ready for a day of skiing, and as you zip up your jacket, disaster strikes. The zipper gets stuck, and no matter how hard you tug, it just won’t budge. Frustration sets in, and you start to wonder if it’s time to retire your beloved jacket. But fear not, because with a little bit of patience and some basic sewing skills, you can easily replace that broken zipper and give your jacket a new lease on life.
The first step in this repair process is to gather the necessary tools and materials. You will need a seam ripper, a new zipper that matches the length and color of your old one, a sewing machine or needle and thread, and some pins to hold everything in place. Once you have everything you need, it’s time to get to work.
Start by carefully removing the old zipper using the seam ripper. Take your time with this step to avoid damaging the fabric of your jacket. Once the old zipper is removed, take a moment to assess the condition of the surrounding fabric. If you notice any tears or frayed edges, now is the perfect time to make any necessary repairs.
Next, take your new zipper and position it on the jacket, making sure it lines up perfectly with the opening. Use the pins to secure the zipper in place, ensuring that it is straight and centered. This step is crucial for achieving a professional-looking repair.
Now comes the fun part – sewing! If you have a sewing machine, set it to a medium stitch length and carefully sew along the edge of the zipper tape, removing the pins as you go. If you prefer to sew by hand, use a strong needle and thread and make small, even stitches along the edge of the zipper tape. Take your time with this step to ensure a secure and durable repair.
Once you have sewn the new zipper in place, give it a test run. Zip and unzip your jacket a few times to make sure everything is working smoothly. If you notice any issues, go back and make any necessary adjustments.
Congratulations! You have successfully replaced the broken zipper on your ski jacket. Take a moment to admire your handiwork and pat yourself on the back for saving yourself the cost of a new jacket. Now you can hit the slopes with confidence, knowing that your trusty jacket is ready to take on whatever Mother Nature throws your way.
In conclusion, repairing a ski jacket doesn’t have to be a daunting task. By following these simple steps, you can easily replace a broken zipper and extend the life of your favorite jacket. So don’t let a minor setback keep you from enjoying your winter adventures. With a little bit of creativity and determination, you can keep your ski jacket in top shape for many seasons to come.
Fixing a Ripped or Torn Pocket on Your Ski Jacket

Skiing is a thrilling sport that allows us to glide down snow-covered slopes, feeling the rush of the wind against our faces. But as with any outdoor activity, accidents can happen, and our beloved ski jackets may suffer the consequences. One of the most common issues skiers face is a ripped or torn pocket on their ski jacket. However, fear not, for I am here to guide you through the process of repairing this unfortunate mishap.
First and foremost, take a deep breath and remind yourself that you are capable of fixing this problem. With a little patience and determination, your ski jacket will be as good as new. The first step is to assess the damage. Is the rip small or large? Is it a clean tear or are there frayed edges? Understanding the extent of the damage will help you determine the best course of action.
If the rip is small and the edges are clean, you’re in luck! This type of tear is relatively easy to fix. Start by gathering the necessary materials: a needle, thread, and a thimble. Choose a thread that matches the color of your ski jacket, ensuring that the repair will be seamless. Now, thread the needle and tie a knot at the end.
Next, carefully align the torn edges of the pocket, making sure they match up perfectly. This step is crucial to ensure a neat and tidy repair. Once the edges are aligned, use the thimble to protect your finger and begin stitching. Start from one end of the tear and work your way to the other, using small, even stitches. Remember to pull the thread tight after each stitch to ensure a secure repair.
For larger tears or those with frayed edges, a slightly different approach is needed. Begin by trimming any loose threads or frayed edges with a pair of sharp scissors. This will create a clean surface for the repair. Once the edges are trimmed, follow the same steps as before, aligning the torn edges and stitching them together. However, for larger tears, you may need to reinforce the repair by stitching a patch of fabric on the inside of the pocket. This will provide extra strength and durability, ensuring that your repair withstands the test of time.
As you stitch, let your mind wander to the slopes, envisioning yourself gliding effortlessly down the mountain. Allow the rhythmic motion of the needle and thread to calm your mind and inspire you. Remember, this repair is not just about fixing a torn pocket; it is a testament to your resilience and determination. It is a reminder that you can overcome any obstacle that comes your way, both on and off the slopes.
Once you have completed the repair, take a moment to admire your handiwork. Your ski jacket is now ready to accompany you on countless adventures, shielding you from the elements and keeping you warm. As you zip up your jacket, feel a sense of pride and accomplishment. You have not only repaired a torn pocket but also demonstrated your ability to overcome challenges with grace and creativity.
In conclusion, repairing a ripped or torn pocket on your ski jacket is a task that requires patience, determination, and a touch of creativity. By following these steps and allowing yourself to be inspired by the process, you can restore your jacket to its former glory. So, the next time you hit the slopes, remember that you are not just wearing a ski jacket; you are wearing a symbol of your resilience and the adventures that lie ahead.
Restoring Waterproofing on Your Ski Jacket
Are you an avid skier who loves hitting the slopes every winter? If so, you probably understand the importance of having a reliable ski jacket. Not only does it keep you warm and protected from the elements, but it also adds a touch of style to your skiing ensemble. However, over time, even the best ski jackets can lose their waterproofing capabilities. If you find yourself in this predicament, fear not! With a little bit of effort and some simple steps, you can restore the waterproofing on your ski jacket and have it looking and performing like new.
The first step in restoring the waterproofing on your ski jacket is to clean it thoroughly. Over time, dirt, grime, and other substances can accumulate on the fabric, compromising its ability to repel water. To clean your jacket, start by removing any loose dirt or debris with a soft brush or cloth. Next, fill a sink or basin with warm water and add a small amount of mild detergent. Gently agitate the water to create suds, and then immerse your jacket in the soapy water. Use your hands to massage the fabric, paying special attention to any particularly dirty areas. Once you are satisfied that the jacket is clean, rinse it thoroughly with clean water and gently squeeze out any excess moisture.
After cleaning your ski jacket, it is time to reapply the waterproofing treatment. There are several options available for waterproofing products, including sprays, wash-in treatments, and wax-based solutions. Choose the one that best suits your needs and follow the manufacturer’s instructions for application. In general, you will want to apply the waterproofing treatment to the outside of the jacket, focusing on areas that are most likely to come into contact with moisture, such as the shoulders, sleeves, and hood. Be sure to apply the treatment evenly and allow it to dry completely before wearing or storing your jacket.
In addition to restoring the waterproofing on your ski jacket, it is also important to take steps to maintain its performance over time. One way to do this is by regularly cleaning and reapplying the waterproofing treatment. Depending on how often you use your jacket and the conditions you encounter, you may need to repeat this process once or twice a season. Additionally, it is a good idea to store your ski jacket properly when not in use. Avoid folding or cramming it into a tight space, as this can damage the fabric and compromise its waterproofing capabilities. Instead, hang your jacket in a cool, dry place, preferably on a padded hanger to help maintain its shape.
Restoring the waterproofing on your ski jacket is a simple yet essential task that can greatly extend the life and performance of your favorite winter gear. By following these steps and taking the time to care for your jacket properly, you can ensure that it continues to keep you warm, dry, and stylish for many ski seasons to come. So don’t let a little wear and tear get in the way of your skiing adventures. Take action today and give your ski jacket the TLC it deserves.
Repairing a Damaged Hood on Your Ski Jacket
Repairing a Damaged Hood on Your Ski Jacket
Picture this: you’re on the slopes, gliding effortlessly down the mountain, the wind rushing through your hair, and the sun shining brightly overhead. It’s the perfect day for skiing, and you couldn’t be happier. But suddenly, disaster strikes. Your ski jacket’s hood gets caught on a branch, and before you know it, it’s torn and hanging by a thread. Don’t panic! With a little creativity and inspiration, you can repair your damaged hood and get back to enjoying the slopes in no time.
First things first, assess the damage. Take a close look at the tear in your hood and determine the extent of the problem. Is it a small rip or a larger tear? Is the fabric completely severed, or is it just frayed? Understanding the nature of the damage will help you decide on the best course of action.
Once you’ve assessed the damage, gather your materials. You’ll need a needle, thread, and a pair of scissors. If the tear is large, you may also need some fabric glue or patches. It’s always a good idea to have a few spare buttons on hand as well, just in case.
Now, let’s get down to business. Start by trimming any loose threads or frayed edges around the tear. This will prevent further damage and make it easier to sew. Next, thread your needle and tie a knot at the end of the thread. If you’re using fabric glue or patches, follow the instructions on the packaging to apply them to the damaged area.
With your needle and thread ready, begin sewing. Start by anchoring your thread on one side of the tear, making small, even stitches. Work your way across the tear, pulling the thread tight as you go. Be sure to sew through both layers of fabric to ensure a secure repair. If the tear is particularly large, you may need to reinforce it with a few extra stitches.
As you sew, let your creativity shine. Use a contrasting thread color to add a pop of personality to your repair job. Or, if you’re feeling adventurous, try your hand at embroidery. Stitch a small design or pattern over the tear to turn a repair into a work of art. Not only will this make your ski jacket unique, but it will also inspire others to embrace their own creativity when faced with a similar situation.
Once you’ve finished sewing, give your repair job a final inspection. Check for any loose threads or areas that may need additional reinforcement. Trim any excess thread and make sure the repair is secure. If you’re satisfied with the results, give yourself a pat on the back. You’ve successfully repaired your ski jacket’s hood and transformed a moment of frustration into an opportunity for creativity.
Now that your ski jacket is as good as new, it’s time to hit the slopes again. Strap on your skis, zip up your jacket, and let the wind carry you down the mountain. As you glide through the snow, take a moment to appreciate the journey you’ve been on. From a torn hood to a beautifully repaired piece of outerwear, you’ve shown that with a little inspiration and creativity, anything is possible. So go out there and conquer the slopes, knowing that you have the skills to repair any damage that comes your way.
Fixing a Detached or Loose Velcro on Your Ski Jacket
Do you have a beloved ski jacket that you just can’t bear to part with, even though it’s seen better days? Perhaps the Velcro on your jacket has become detached or loose, making it less effective at keeping out the cold and snow. Don’t worry, because with a little bit of creativity and inspiration, you can easily repair your ski jacket and have it looking and functioning like new again.
The first step in fixing a detached or loose Velcro on your ski jacket is to gather the necessary materials. You will need a needle, thread, and a pair of scissors. It’s also a good idea to have some extra Velcro on hand, just in case you need to replace any worn-out pieces.
Once you have your materials ready, start by examining the detached or loose Velcro on your jacket. Determine if the Velcro itself is damaged or if it has simply come loose from the fabric. If the Velcro is damaged, you may need to replace it entirely. However, if it’s just loose, you can easily reattach it.
To reattach the Velcro, begin by cutting a piece of thread that matches the color of your jacket. Thread the needle and tie a knot at the end. Carefully insert the needle through the fabric near the detached Velcro, making sure to catch both the fabric and the Velcro with the needle.
Next, pull the thread through, leaving a small loop. Insert the needle back through the loop, creating a knot that will secure the thread in place. Repeat this process several times, creating a tight and secure stitch that will hold the Velcro in place.
Once you have reattached the Velcro, test it to ensure that it is secure and functioning properly. If it still feels loose, you may need to reinforce the stitching by repeating the process or using a stronger thread.
If the Velcro on your ski jacket is beyond repair, it’s time to replace it. Start by carefully removing the damaged Velcro from the jacket using a pair of scissors. Be sure to cut as close to the fabric as possible to avoid leaving any excess material.
Once the old Velcro has been removed, measure and cut a piece of new Velcro to fit the area. Make sure to choose a Velcro that matches the color and size of the original. Attach one side of the Velcro to the fabric using the same stitching technique described earlier.
Finally, attach the other side of the Velcro to the corresponding area on the jacket. Press firmly to ensure a secure bond. Test the new Velcro to make sure it is functioning properly and holding the jacket together effectively.
Repairing a detached or loose Velcro on your ski jacket may seem like a daunting task, but with a little bit of creativity and inspiration, you can easily restore your jacket to its former glory. By following these simple steps and using the right materials, you’ll be back on the slopes in no time, confident that your jacket will keep you warm and protected from the elements. So don’t give up on your favorite ski jacket just yet – give it the repair it deserves and enjoy many more seasons of skiing adventures.
Repairing a Frayed or Damaged Cuff on Your Ski Jacket
Are you an avid skier who loves hitting the slopes every winter? If so, you probably understand the importance of having a reliable ski jacket. Not only does it keep you warm and protected from the elements, but it also adds a touch of style to your winter wardrobe. However, over time, even the most durable ski jackets can start to show signs of wear and tear. One common issue that many skiers face is a frayed or damaged cuff on their jacket. But fear not, because repairing it is easier than you might think!
First, gather all the necessary materials for the repair. You will need a sewing kit, which includes a needle, thread, and scissors. Additionally, you may want to have some fabric glue on hand, as it can be useful for reinforcing the repair. Once you have everything you need, find a clean and well-lit workspace where you can comfortably work on your jacket.
Start by examining the frayed or damaged cuff closely. Is it a small tear or a larger hole? Understanding the extent of the damage will help you determine the best course of action. If it’s just a minor fray, you can simply trim off any loose threads with your scissors. Be careful not to cut into the fabric itself, as this could make the problem worse.
For larger tears or holes, you will need to sew the cuff back together. Thread your needle with a color of thread that matches your jacket as closely as possible. Begin by knotting the end of the thread to prevent it from slipping through the fabric. Then, carefully stitch along the edges of the tear, using small and even stitches. Take your time with this step, as precision is key to achieving a seamless repair.
Once you have sewn the tear shut, reinforce the repair by applying a thin layer of fabric glue along the stitched area. This will help secure the threads in place and prevent further fraying. Be sure to let the glue dry completely before wearing your jacket again.
If you want to add a personal touch to your repair, consider using a contrasting color of thread or even embroidery floss. This can turn a simple repair into a unique and eye-catching detail on your jacket. Get creative and experiment with different stitching patterns or even add some decorative patches to further personalize your ski jacket.
Remember, repairing your ski jacket is not only a practical solution but also an opportunity to showcase your creativity and resourcefulness. By taking the time to fix a frayed or damaged cuff, you are extending the life of your beloved jacket and reducing waste. Plus, you’ll feel a sense of accomplishment every time you hit the slopes, knowing that you’ve given your jacket a new lease on life.
So, the next time you notice a frayed or damaged cuff on your ski jacket, don’t despair. With a little patience and some basic sewing skills, you can easily repair it yourself. Embrace the challenge, unleash your creativity, and let your repaired jacket become a symbol of your resilience and determination both on and off the slopes. Happy skiing!
Maintaining and Extending the Lifespan of Your Ski Jacket
Are you an avid skier who loves hitting the slopes every winter? If so, you probably understand the importance of having a reliable ski jacket. Not only does it keep you warm and protected from the elements, but it also adds a touch of style to your winter wardrobe. However, over time, your beloved ski jacket may start to show signs of wear and tear. But fear not! With a little bit of effort and some simple repairs, you can extend the lifespan of your ski jacket and keep it looking as good as new.
One of the most common issues with ski jackets is a broken zipper. It can be frustrating when you’re trying to zip up your jacket and the zipper gets stuck or comes off track. But don’t worry, repairing a broken zipper is easier than you might think. Start by carefully removing the old zipper using a seam ripper. Then, purchase a new zipper that matches the color and size of the original. Pin the new zipper in place and sew it on using a sewing machine or a needle and thread. Voila! Your jacket is ready to zip up and hit the slopes once again.
Another common problem with ski jackets is ripped or torn fabric. Whether it’s from a fall on the slopes or a snag on a tree branch, a tear in your jacket can be disheartening. But don’t despair! You can easily repair small tears using a patch. Start by cleaning the area around the tear with a damp cloth and some mild soap. Then, cut a patch from a piece of fabric that matches your jacket. Apply a small amount of fabric glue to the edges of the tear and press the patch firmly in place. Allow it to dry completely before wearing your jacket again. For larger tears, you may need to sew the edges of the tear together before applying the patch.
In addition to repairing specific issues, it’s important to regularly maintain your ski jacket to ensure its longevity. One way to do this is by washing it properly. Always check the care instructions on the label before washing your jacket. Most ski jackets can be machine washed on a gentle cycle with a mild detergent. Avoid using bleach or fabric softener, as these can damage the fabric. After washing, hang your jacket to air dry, as excessive heat can cause the fabric to shrink or warp.
Another way to extend the lifespan of your ski jacket is by storing it properly during the off-season. Before packing it away, make sure your jacket is clean and completely dry. Store it in a cool, dry place away from direct sunlight, as prolonged exposure to sunlight can fade the colors and weaken the fabric. Consider using a garment bag or a plastic storage container to protect your jacket from dust and pests.
By taking the time to repair and maintain your ski jacket, you can ensure that it will continue to keep you warm and stylish for many winters to come. So don’t let a broken zipper or a small tear discourage you. With a little bit of effort and some simple repairs, you can breathe new life into your beloved ski jacket and hit the slopes with confidence. Remember, a well-maintained ski jacket is not just a piece of clothing, but a symbol of your passion for skiing and your dedication to enjoying the great outdoors.
Q&A
1. How can I repair a tear in my ski jacket?
You can repair a tear in your ski jacket by using a patch or adhesive specifically designed for repairing outdoor gear.
2. What should I do if the zipper on my ski jacket is broken?
If the zipper on your ski jacket is broken, you can try replacing it with a new zipper or take it to a professional tailor or outdoor gear repair shop for assistance.
3. How can I fix a ripped seam on my ski jacket?
To fix a ripped seam on your ski jacket, you can use a needle and thread to sew it back together, ensuring to reinforce the stitching for durability.
4. What can I do if the insulation in my ski jacket is damaged?
If the insulation in your ski jacket is damaged, you may need to replace it. This can be done by removing the old insulation and sewing in new insulation or taking it to a professional for repair.
5. How do I repair a broken snap or button on my ski jacket?
To repair a broken snap or button on your ski jacket, you can replace it with a new one using a snap or button repair kit.
6. What should I do if the waterproof coating on my ski jacket is peeling off?
If the waterproof coating on your ski jacket is peeling off, you can try reapplying a waterproofing spray or wash-in waterproofing treatment to restore its water resistance.
7. How can I fix a damaged hood on my ski jacket?
To fix a damaged hood on your ski jacket, you can sew any tears or rips using a needle and thread, or replace the entire hood if necessary.
8. What can I do if the lining of my ski jacket is torn?
If the lining of your ski jacket is torn, you can sew it back together using a needle and thread, or replace the lining if needed.
9. How do I repair a broken drawstring on my ski jacket?
To repair a broken drawstring on your ski jacket, you can replace it with a new one by threading it through the appropriate channels or loops.
10. What should I do if the Velcro closures on my ski jacket are no longer sticking?
If the Velcro closures on your ski jacket are no longer sticking, you can try cleaning them with a brush or replacing them with new Velcro strips for better adhesion.
Conclusion
To repair a ski jacket, follow these steps:
1. Assess the damage: Identify the type and extent of the damage on the jacket, such as tears, rips, or broken zippers.
2. Clean the jacket: Before repairing, clean the jacket according to the manufacturer’s instructions to remove any dirt or debris.
3. Patch small tears: For small tears or holes, use a patch kit specifically designed for ski jackets. Cut the patch to size, apply adhesive, and carefully place it over the damaged area.
4. Sew larger tears: For larger tears, use a needle and thread to sew the edges of the tear together. Make sure to use a strong thread and reinforce the stitching for durability.
5. Replace broken zippers: If the jacket’s zipper is broken, carefully remove the old zipper and replace it with a new one of the same size and type. Follow the manufacturer’s instructions or seek professional help if needed.
6. Reapply waterproofing: After repairing, reapply a waterproofing treatment to restore the jacket’s water-resistant properties. Follow the product instructions for best results.
7. Test the repairs: Once the repairs are complete, test the jacket’s functionality and durability before using it on the slopes.
In conclusion, repairing a ski jacket involves assessing the damage, cleaning the jacket, patching small tears, sewing larger tears, replacing broken zippers, reapplying waterproofing, and testing the repairs. Following these steps can help extend the lifespan of your ski jacket and keep you warm and protected on the slopes.
Related Posts

What to Wear to a Tennis Match: Stunning Picks
Looking to ace your style game at the next tennis match? Discover how a chic blue hoodie can become your winning choice, blending casual comfort with a dash of courtside chic.

Stunning Black Tie Attire: Effortless Elegance Unveiled
Whether youre deciding what to wear at a concert or a high-society gala, discovering your ideal black tie outfit is all about embracing effortless elegance that echoes your unique style and sophistication. Lets dive into crafting that perfect, head-turning ensemble together.

Egypt Dress Code: Must-Have Tips for Female Tourists
Navigating the dress code in Egypt can feel like a delicate dance, but fear not, fashionable traveler! Our expert tips will help you dress respectably while still showcasing your unique style, ensuring every moment of your journey is as comfortable as it is chic.
Must-Have Outfits for a Steam Room Visit
Step into the steam room with confidence and elegance by mastering **what to wear to a steam room**. Our guide ensures you stay effortlessly stylish and supremely comfortable, no matter the humidity!
K-Pop Concert Attire: Must-Have Outfits for Trendsetters
Step into the spotlight at your next K-Pop concert with outfits that echo the electrifying energy of BTS, BLACKPINK, or EXO! Let us guide you through selecting vibrant, trend-setting pieces that not only capture the essence of K-pop culture but also showcase your individual flair and style.

Stunning Outfits for College Football Games: Score Big!
Dress to impress at your next college football game with Covetis luxurious and spirited fashion finds! Whether you’re cheering from the bleachers or a cozy college bar, discover outfits that truly resonate with your personal style and amplify your game-day experience.
Stunning Shoe Styles for Winter Graduations!
Deciding what to wear for a winter graduation can be a breeze, especially with the right shoes! Let me guide you through picking stylish yet practical footwear that will have you walking across that stage with confidence and grace.

What to Wear: Stunning Outfits for Theater Nights
Soaring above the clouds in a hot air balloon is an unparalleled adventure, and choosing what to wear is crucial for comfort and style. Lets ensure your outfit is as breathtaking as the view, blending chic with practicality for an unforgettable aerial experience.

Country Club Chic: Must-Have Outfits for Elegant Evenings
For your next pearls and prosecco bridal shower, embrace the timeless allure of country club chic with outfits that blend classic elegance with a touch of modern sophistication. Discover how to curate that perfect ensemble that will have you radiating confidence and style at any upscale event.

Stunning & Safe: Best Outfits for Food Workers
Stepping into the courtroom as a witness requires a thoughtful selection of attire that reflects professionalism and respect. Discover the key elements of dressing appropriately for court to ensure you present a dignified and sincere image that supports the gravitas of the proceedings.

Fine Dining Fashion: Must-Have Looks for Green Blazers
Stepping into a fine dining restaurant requires a touch of elegance and a dash of style; discover how a sophisticated green blazer can elevate your next gourmet outing, ensuring you look as exquisite as the dishes being served.

Stunning Jewelry Must-Haves for Bridesmaids
Deciding what jewelry to wear as a bridesmaid is more than just adornment; its about crafting moments and memories. Let me guide you through selecting stunning pieces that complement the bridal glow and celebrate your unique touch to the day’s enchantment.